
Two parts, working together
The Workplace is where you run your work, and the EIQ Connector plugs your real business in behind it. You get both.
Evolvepreneur®iQ Workplace
A dashboard of everyday jobs, right inside Claude. Pick one, fill a field or two, and it runs — across every business you own. It installs free as a Cowork plugin and has a dark mode.
Get the plugin on GitHub →EIQ Manager
This is what makes it real. It links your CRM, accounting, inbox, EvolveDocs, Page Builder and more — 84 tools that don’t just read your data, they get work done: draft a newsletter, build a proposal, update a book chapter. Anything that sends, publishes or spends waits as a draft for your OK.
Explore EIQ Manager →How it works — three steps
Connect the EIQ Manager connector to Claude so your console’s EIQ Connector, Personas and data tabs have live data to work with. It takes a minute, and you do it once per business.
One connector per business — each becomes a brand on your console.
Open Settings → Connectors
In Claude, open Settings and choose Connectors. Connected ones show a green tick.
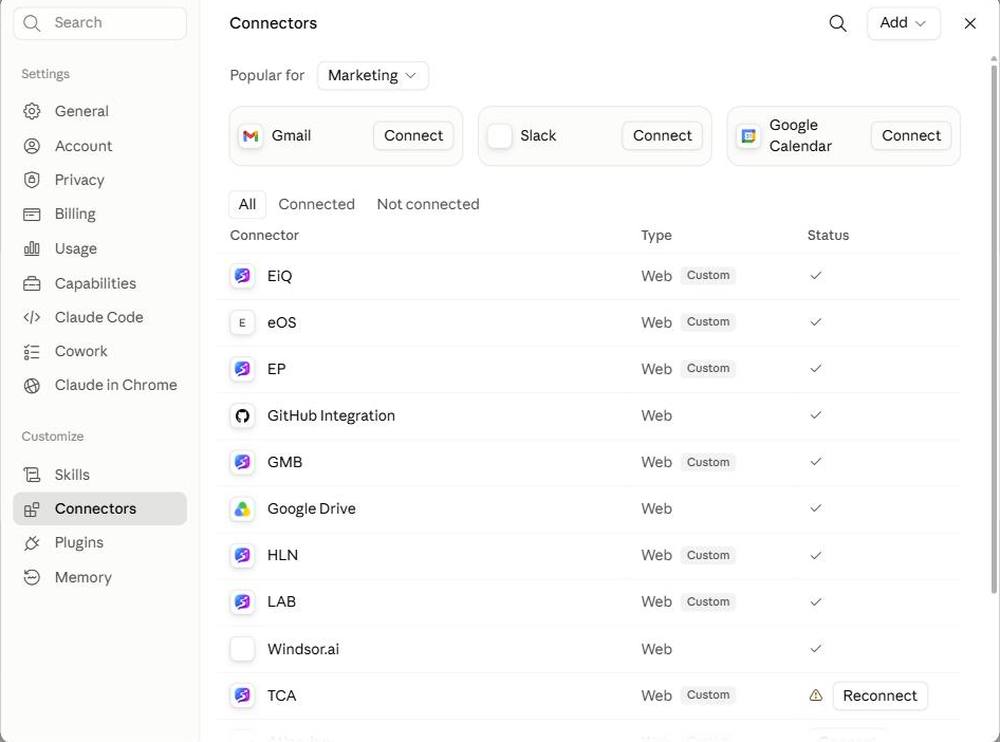
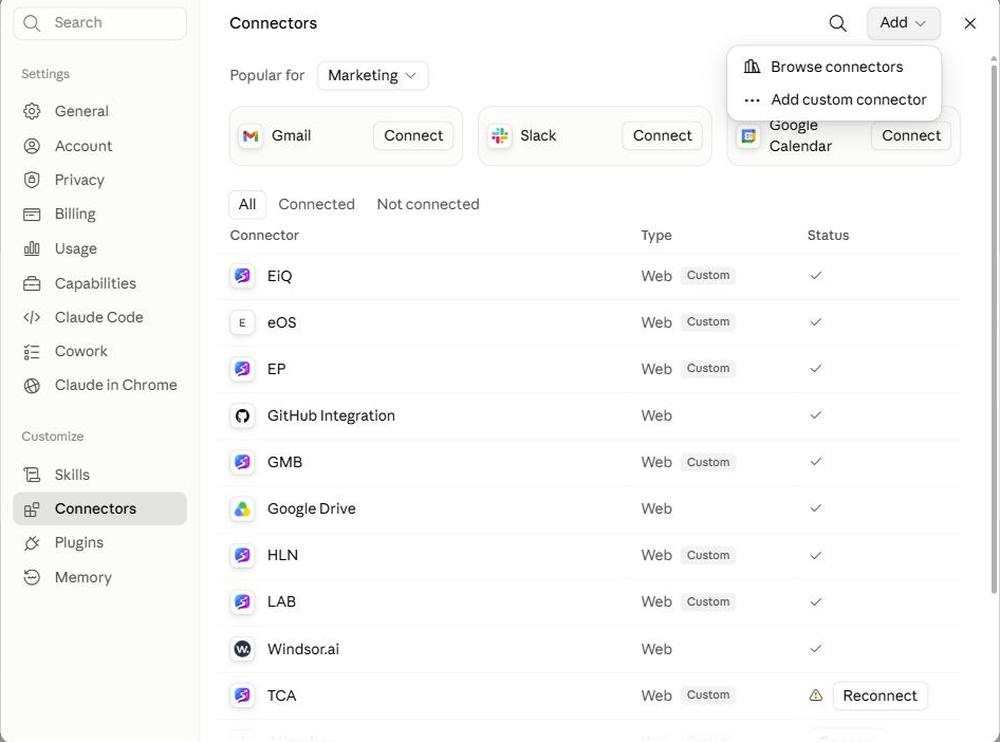
Click Add → Add custom connector
Top right, click Add, then Add custom connector. EIQ Manager is a custom connector, not one of the pre-built ones.
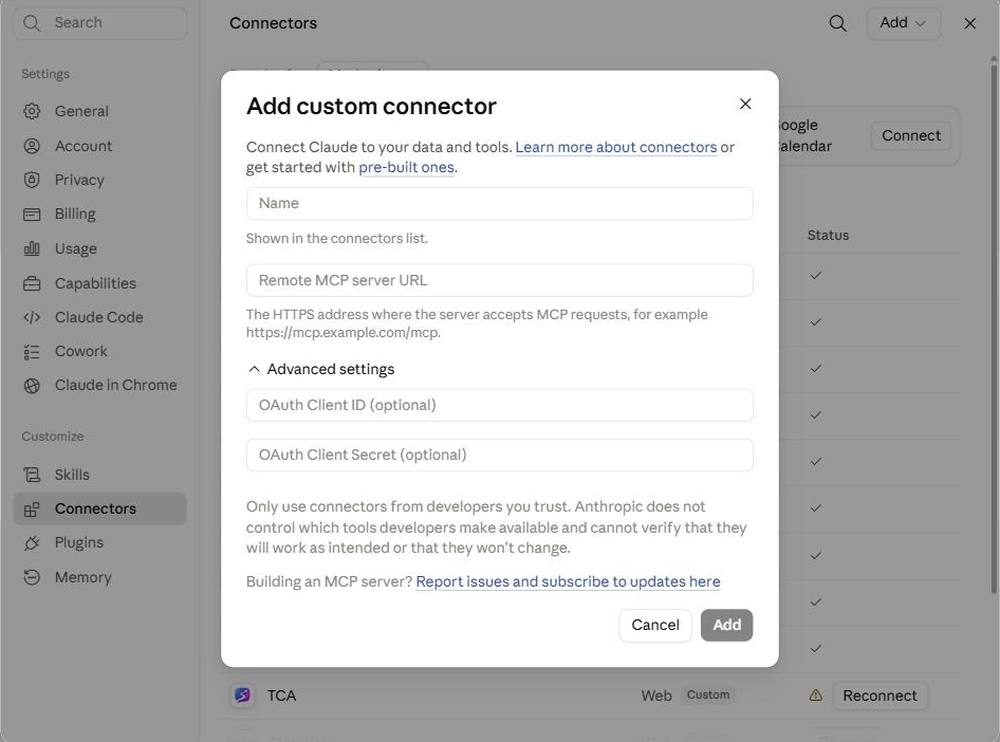
Enter the name and MCP server URL, then Add
Give it a Name (e.g. “EiQ” — just the label in your list), paste the EIQ Manager MCP server URL for that business, and click Add. A sign-in popup opens — approve it. No keys to paste; leave the Advanced OAuth fields blank.
You never reinstall connectors — they stay current on their own. You only step in when one drops its sign-in.
Spot a dropped connector
On Settings → Connectors, a connector that has lost its sign-in shows an amber warning and a Reconnect button (instead of the green tick). The tell-tale sign in the console is the EIQ Connector, Personas or data tabs coming back empty.
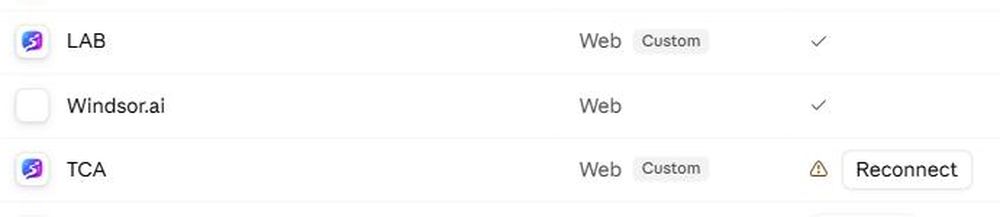
Click Reconnect & approve
Click the Reconnect button next to that connector and approve the sign-in popup again. No re-adding, no URL to re-enter — it reuses the connector you already set up.
Refresh the console
Back in the console, say “rebuild my console” to pull the live data back into the tabs.